진짜 얼마 사용하지도 못한 fidelio x2hr .. 헤드를 고정시키는 조그마한 플라스틱 하나가 부러져서 거의 방치해뒀었다. 박스에 고이...
찾아보니 그 부분이 부러진 분들이 은근히 나오더라. 사설에 물어보니.. 무려 6만원을 부르길래.. 그냥 방치했던건데...
지인이 헤드폰을 수리하려한다는 얘기를 들으니 처박아뒀던 피델리오가 생각나서 꺼내봤다.
그때는 왜 직접 수리할 생각을 안했는지 모르겠는데, 아무튼 우선 분해 및 관련 수리내용을 찾아보니 저기 마지막에 적어놓을 분리 관련 내용을 정리한 사이트가 있었다. 그 글 덕분에 직접 수리하려고 마음먹었고, 꽤나 삽질끝에 ... 결국 사용가능한 레벨로 살려놨다. 지금듣고 있고...
간략히 내가 한 작업은
0. 천만다행히... 지지대의 한쪽만 부러졌는데 반대쪽 지지대를 이식하기로 한다. 그럼 이식해준곳은? 그냥 적당히 고정하기로 계획함
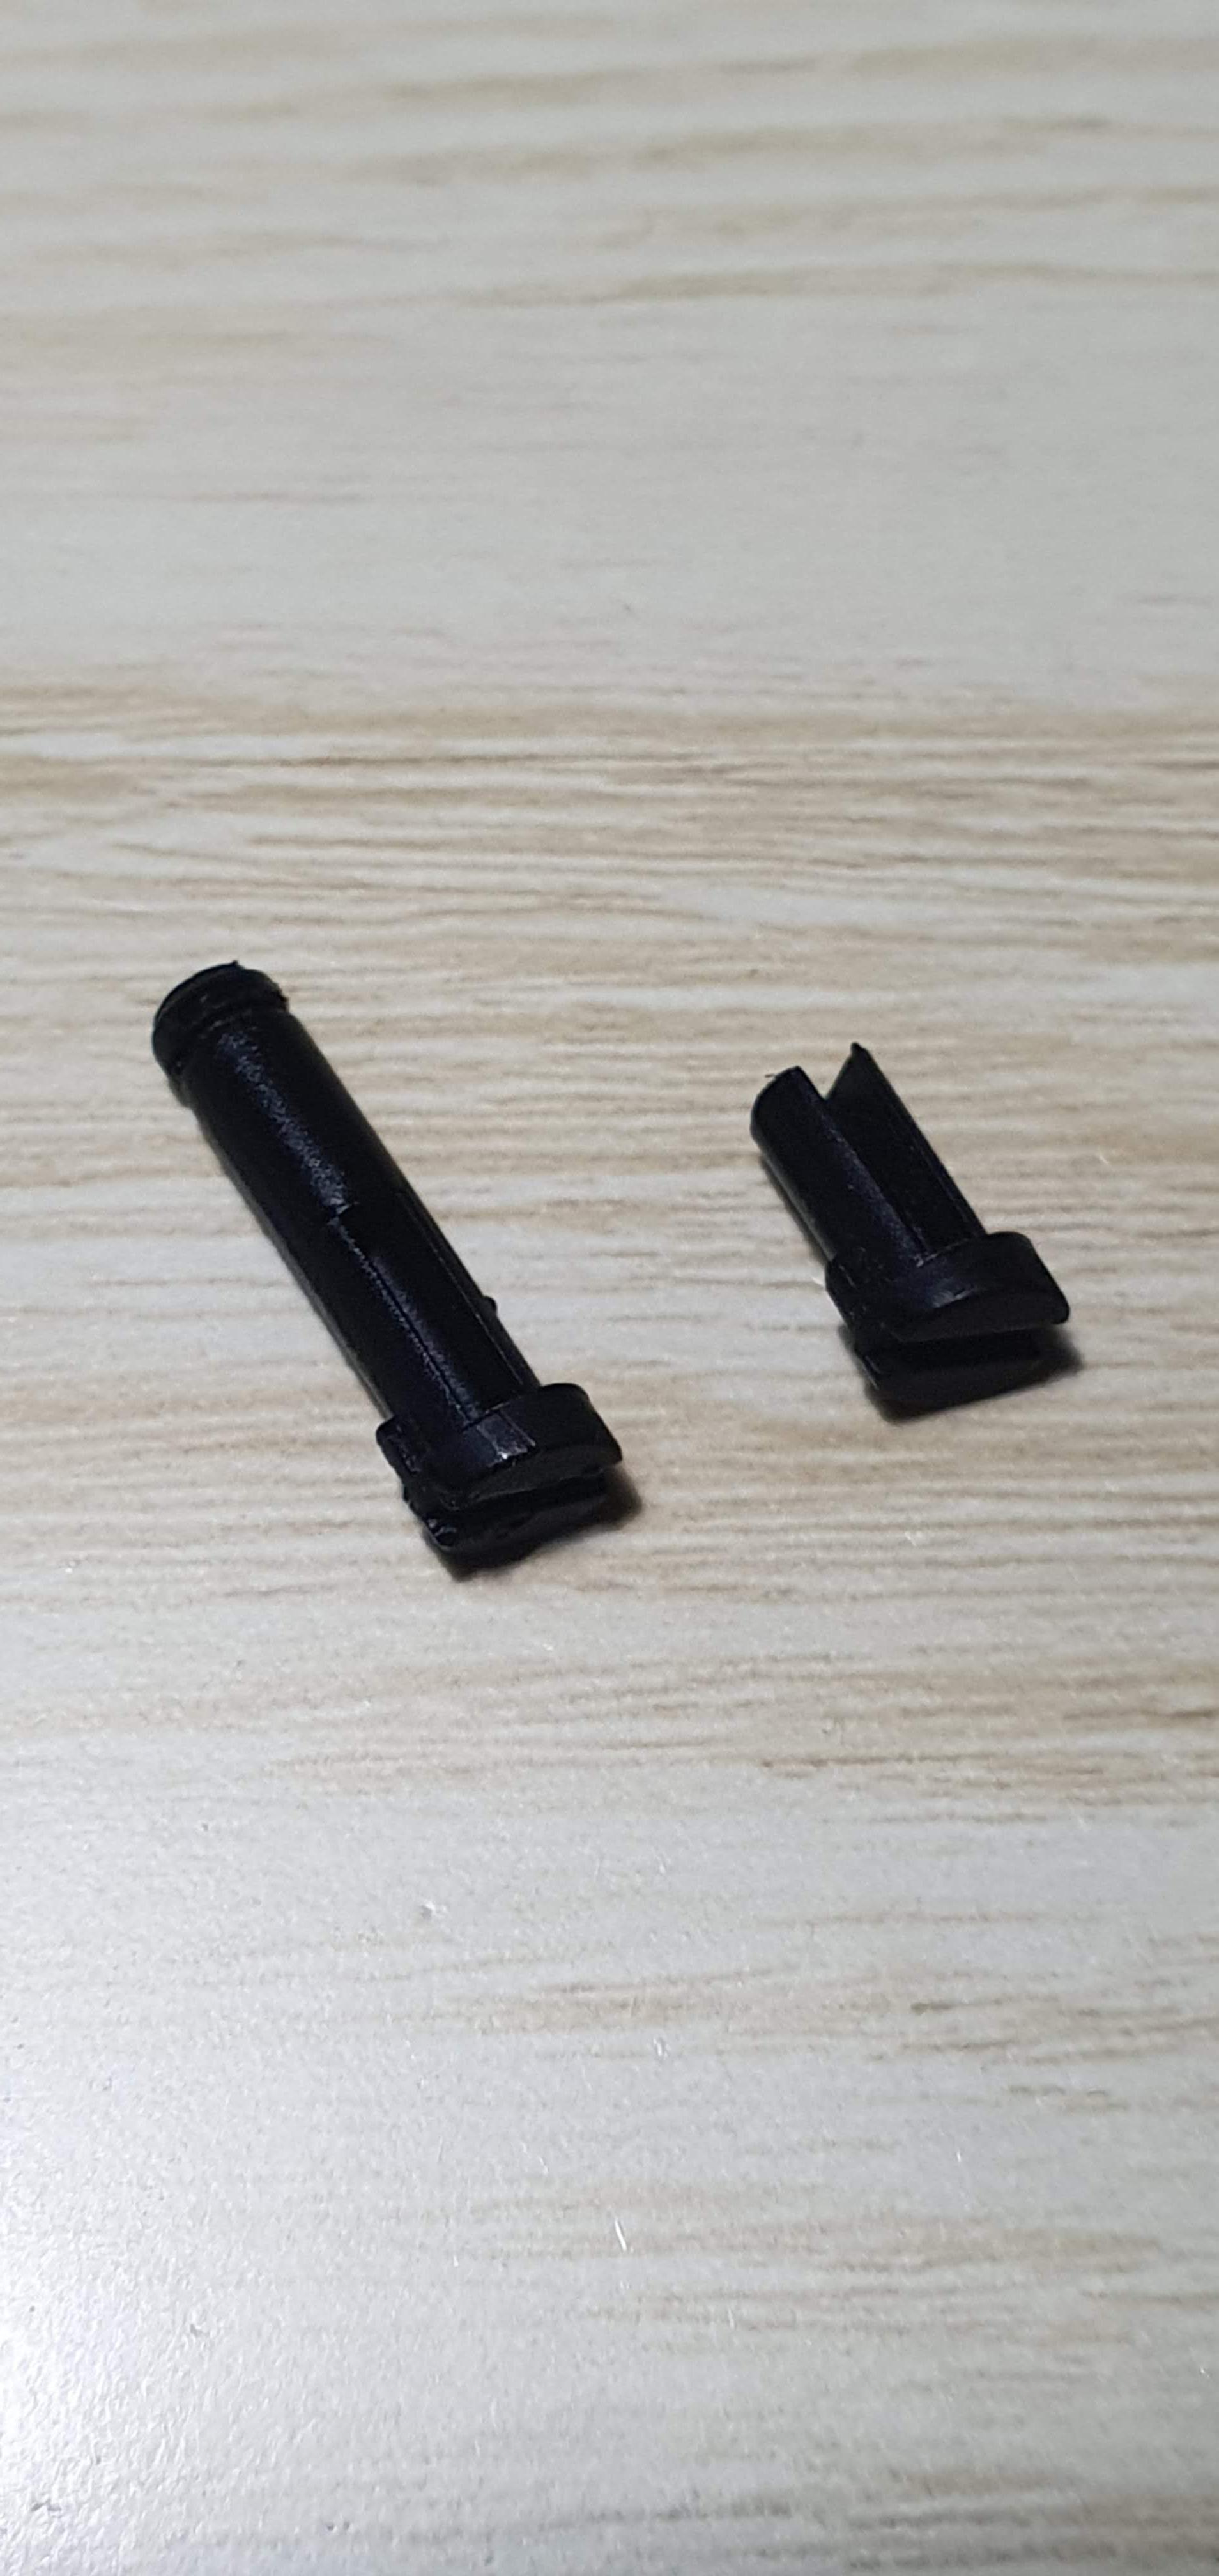
1. 멀쩡한 쪽의 지지대를 분리해서 부품을 추출한다.
2. 부러진 부분을 다 제거해서 분리한다.
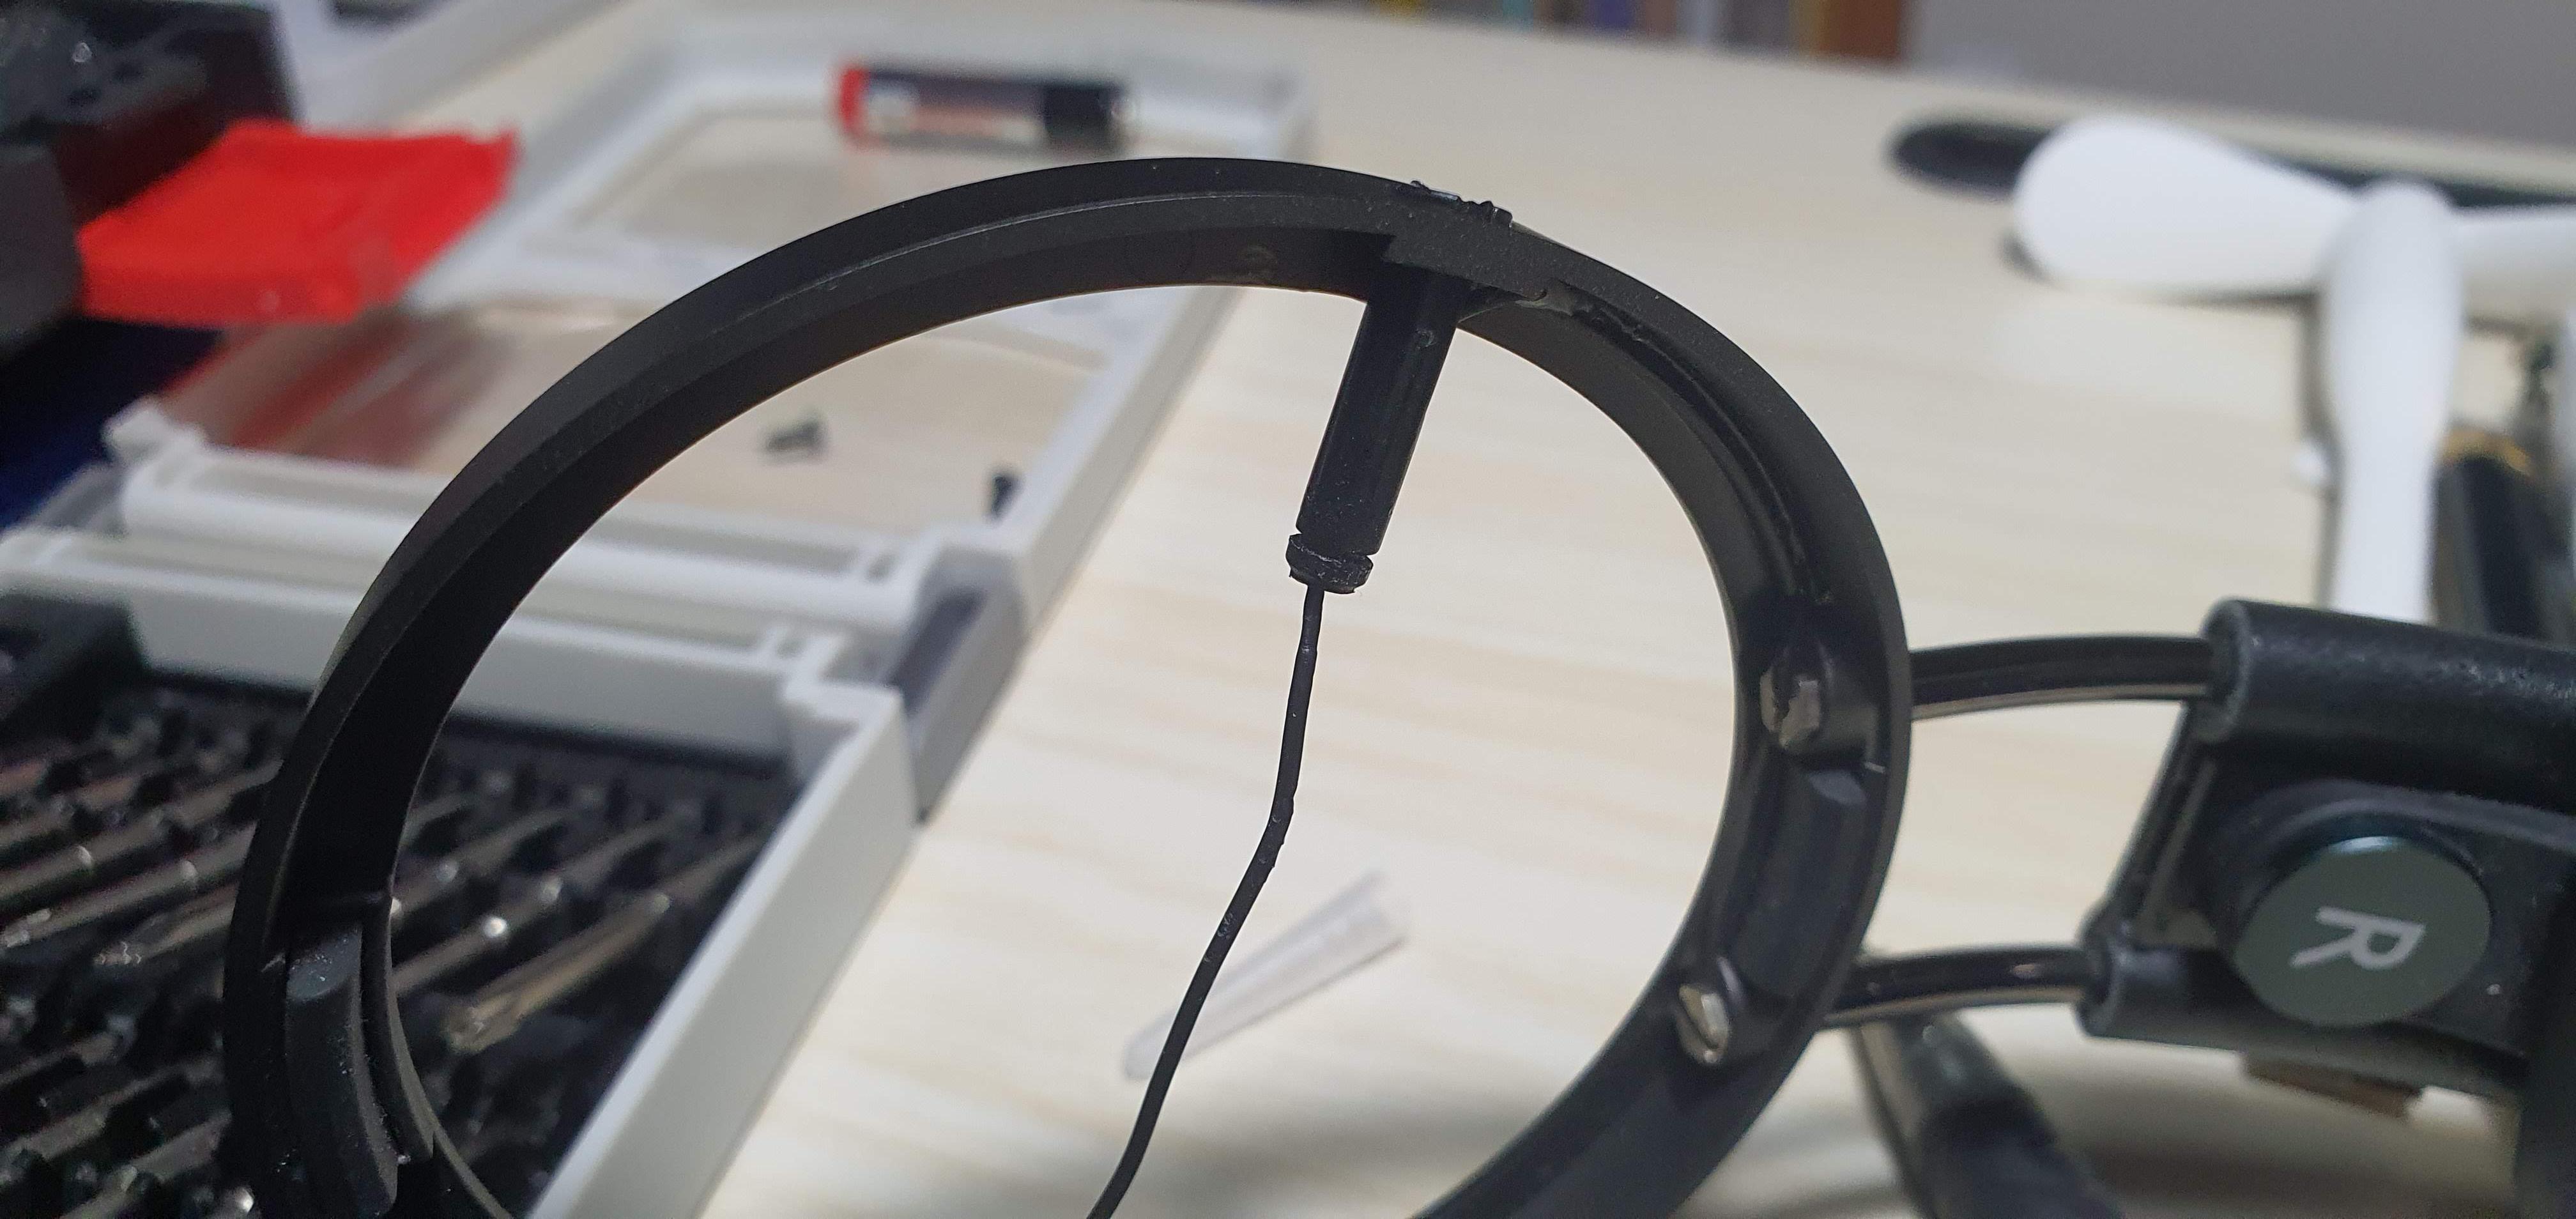
3. 1번에서 건진 멀쩡한 부분을 2번에 이식한다. 이때 선을 분리해야하므로 인두기로 헤드폰 유닛으로 부터 선을 분리한다. (알리에서 산게 다 이럴때 쓸모가;; )

4. 다 이식했으면 다시 인두기로 납땜을 하고 하나하나 조립한다. 이때 조그마한 걸쇠가 있는데 여기는 글루건으로 우선 매우고 바로 그위에 그 걸쇠를 눌러서 끼워라. 그럼 오리지날과 비슷해진다.

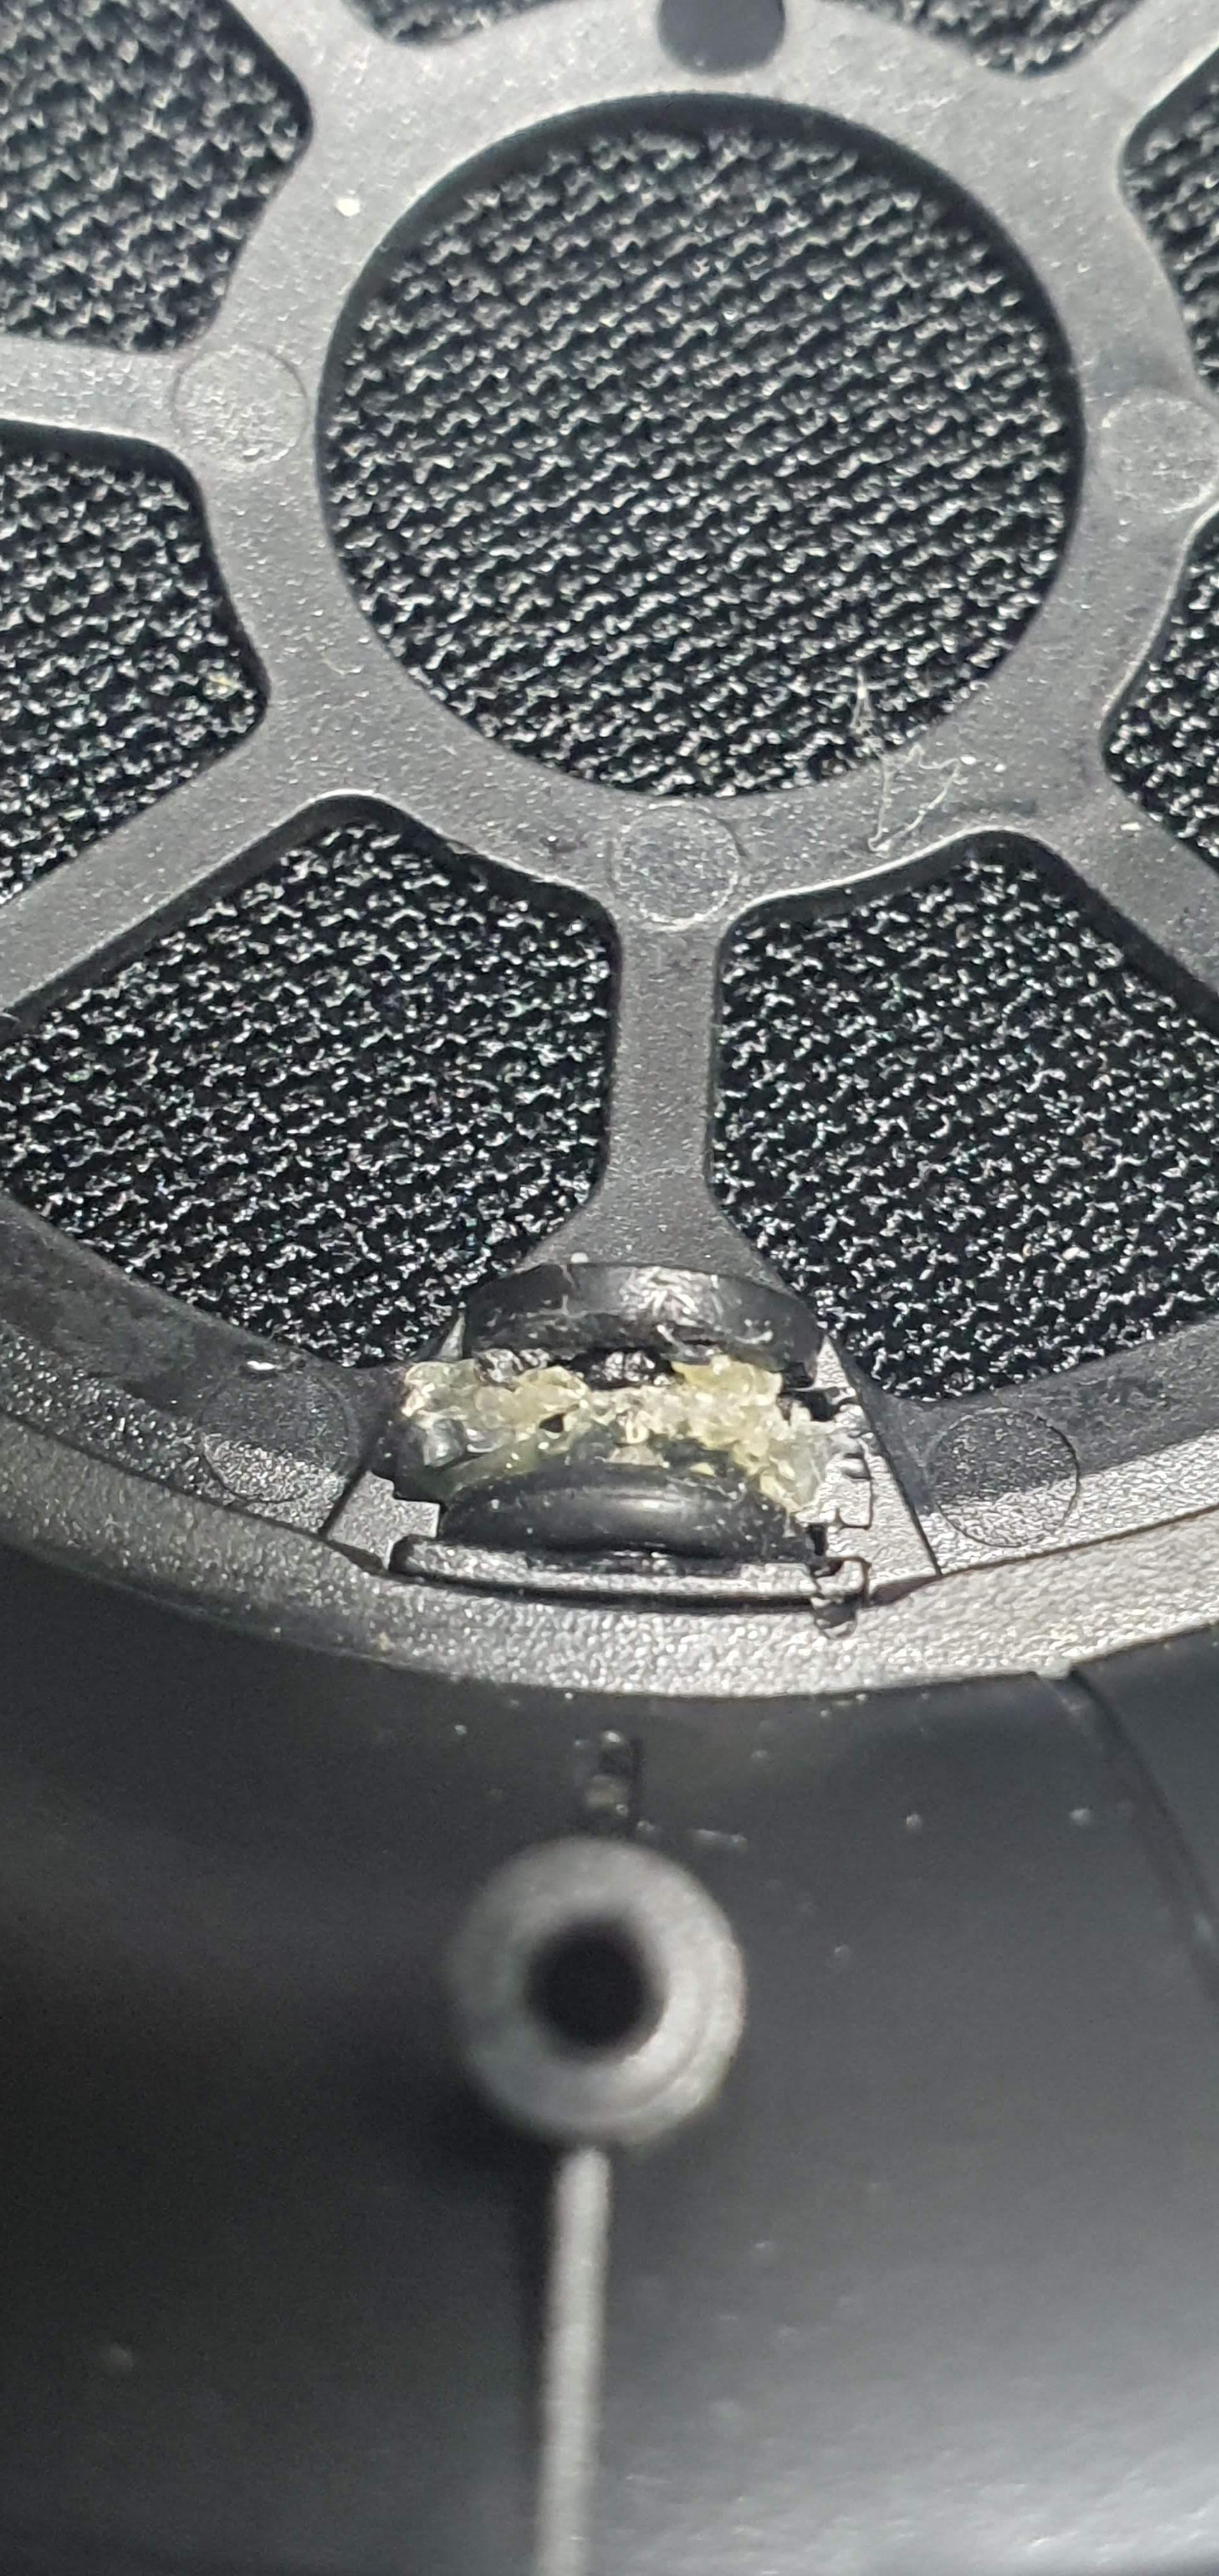

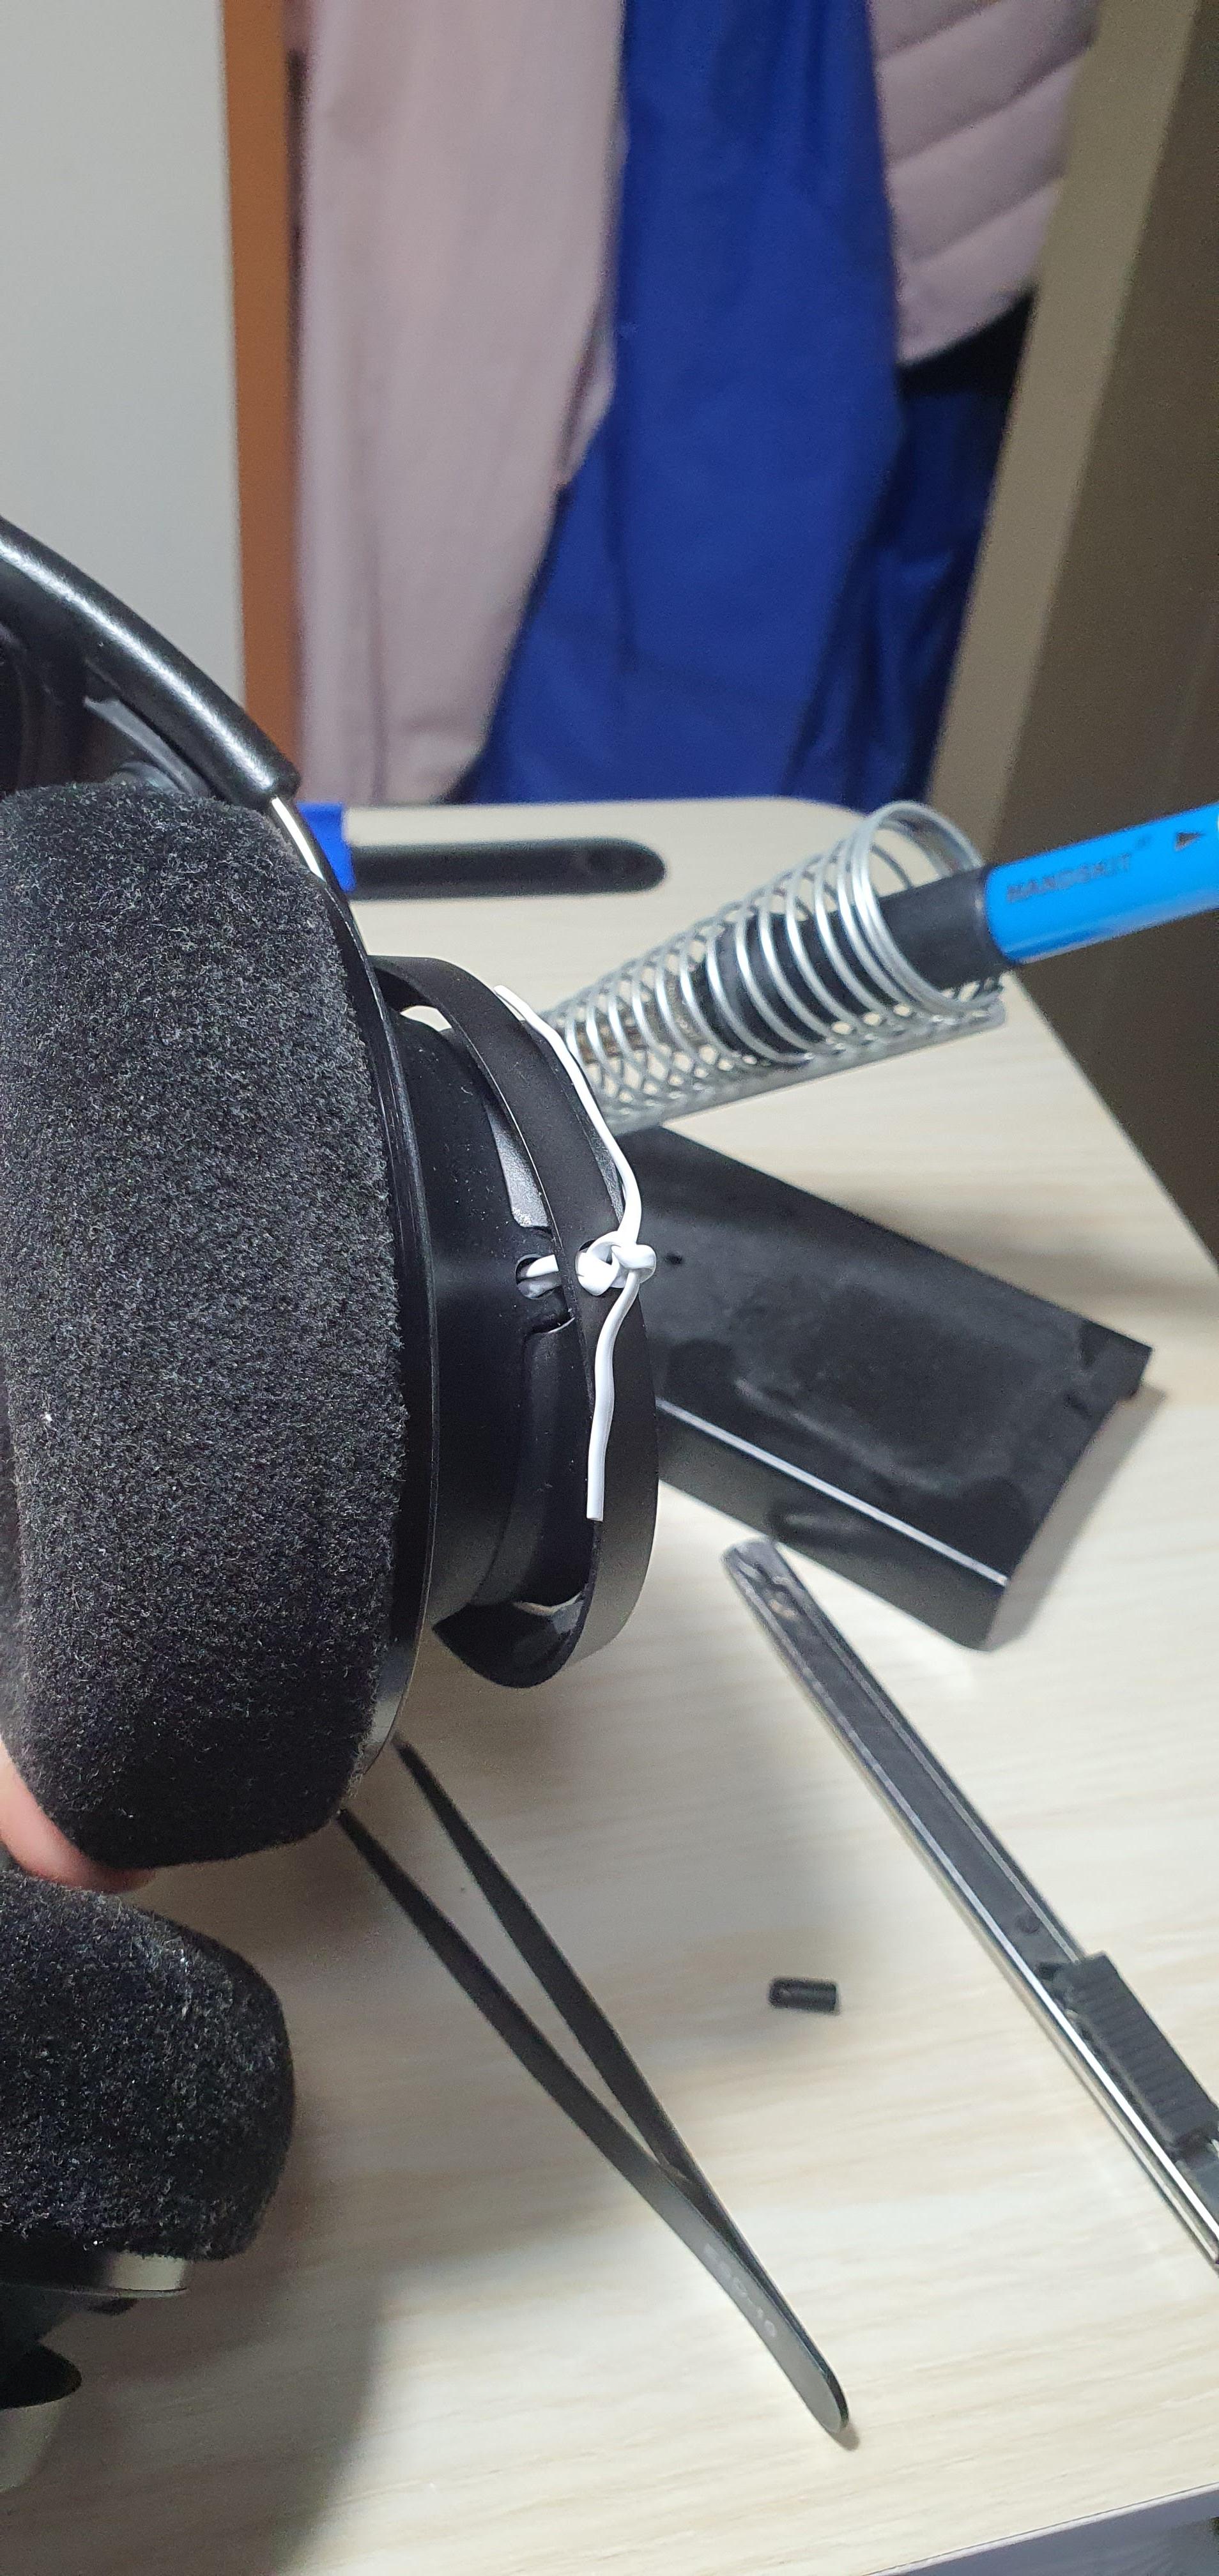
5. 반대편은... 즉 1번의 멀쩡한 부품 제거한 부분은.. 그냥 제품들 사면 철사에
피복된거;? 그거 2개로 빠지지 않도록 연결해둔다. 그게 끝; 사실은 파이가 3짜리 볼트너트로 나름 기능적으로 완벽? 하게 수리해도 되는데, 없을뿐더라 3파이따리 볼트가 길이가 가장 짧은게 5였다; 즉 커트해야한다는 소리임. 집에 커트기가 있긴한데... 귀찮 -ㅅ-;
해서... 완료됐다. 위에 순서상은 쉬워보이지만 사실 저렇게 하기전에 부러진부분을 살리려고 한다든지 분해안하고 시도한다든지... 해서 몇시간이나 걸렸다;; 참고로 쇠로 된 걸새를 제거하는걸 해당 사이트가 아니었다면 몰라서 포기했을지도 모른다;
수리후 교훈
1. 가능하면 인두기로 선같은거 분리해놓고 해라
2. 부러진부분을 완벽하게 수리하기 어려워보이면 대체품으로 교체해서 고치자.
3. 부품을 분해없이 순간접착제를 사용하려고 하지마라.... 아무리 귀찮아도 말이지;
아래 사이트에서 직접 보도록 한다. 우선.. 퍼왔다;; 출처는 남긴다.
https://blog.shanock.com/fix-loose-wobbly-earcup-on-philips-fidelio-x2-x2hr/
Fix Loose/Wobbly Earcup on Philips Fidelio X2/X2HR – I May Have Miscalculated
The the location of the wobble. I acquired my Philips Fidelio X2HR headphones about two years ago and fell in love with the sound. They have not been entirely without problems, however. One of those problems is that the connection between the metal headban
blog.shanock.com
Fix Loose/Wobbly Earcup on Philips Fidelio X2/X2HR
The the location of the wobble.
I acquired my Philips Fidelio X2HR headphones about two years ago and fell in love with the sound. They have not been entirely without problems, however. One of those problems is that the connection between the metal headband struts and the metal ring which supports the earcup became slightly wobbly over time. After living with it for awhile, I decided to just get down to it and fix it. After-the-fact, while trying out some Brainwavs earpads, I decided it might be a good idea to share the knowledge.
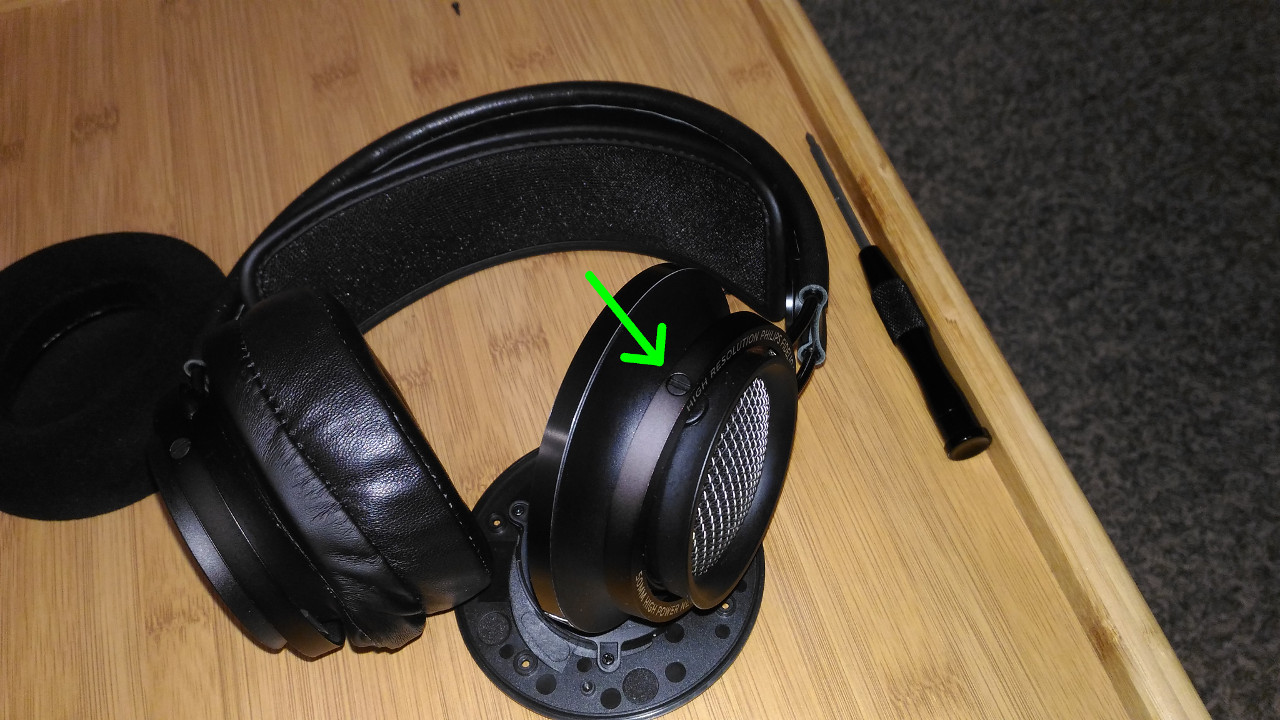
Loose screw
What we are trying to do is tighten two small screws that are visible, but practically inaccessible without removing the earcup from its frame. I had tried using the wrench directly, and later I tried securing the ring by cramming JB Weld into the tiny gap. Neither was successful, so I eventually had to take the headphones apart. I am not going to take my headphones entirely apart again, but I will use pictures and description to tell you what you need to know.
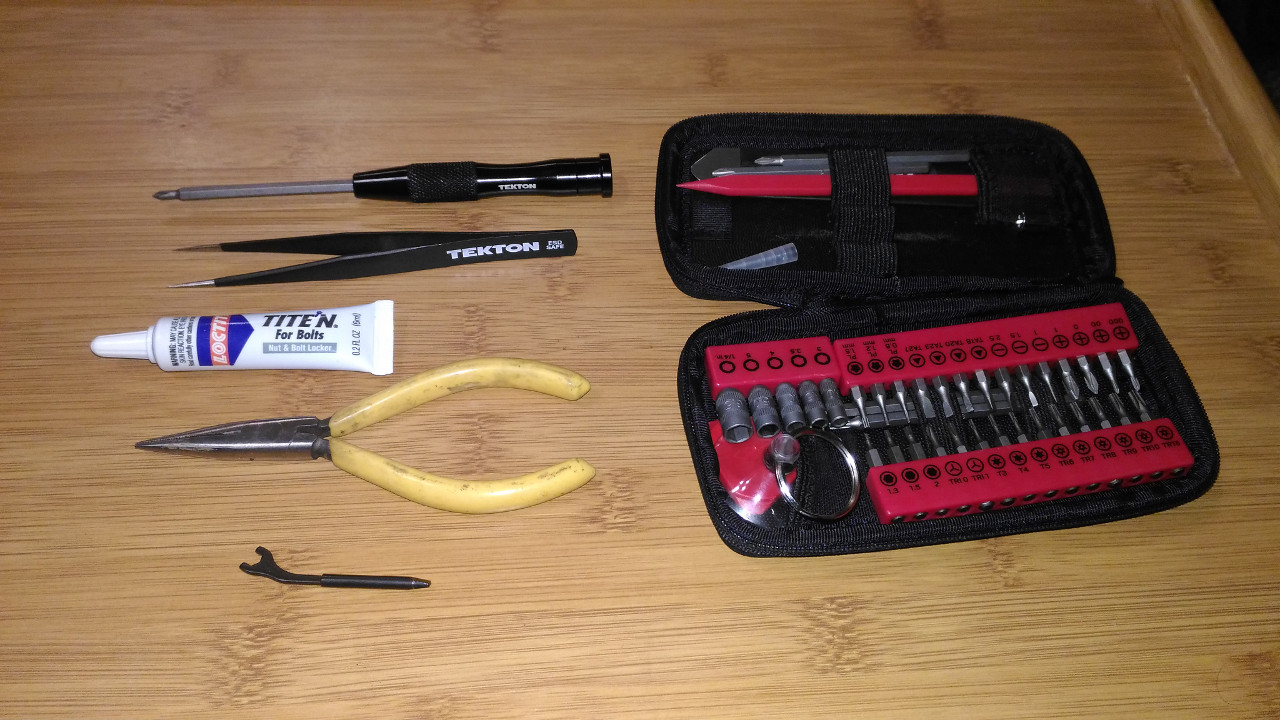
My tools
First, you will need the following tools:
The screwdriver and tweezers I used came from the Tekton 28301 bit set. I won’t be doing a review on it, but suffice it to say that I am very happy with the versatility, quality, price, and portability.
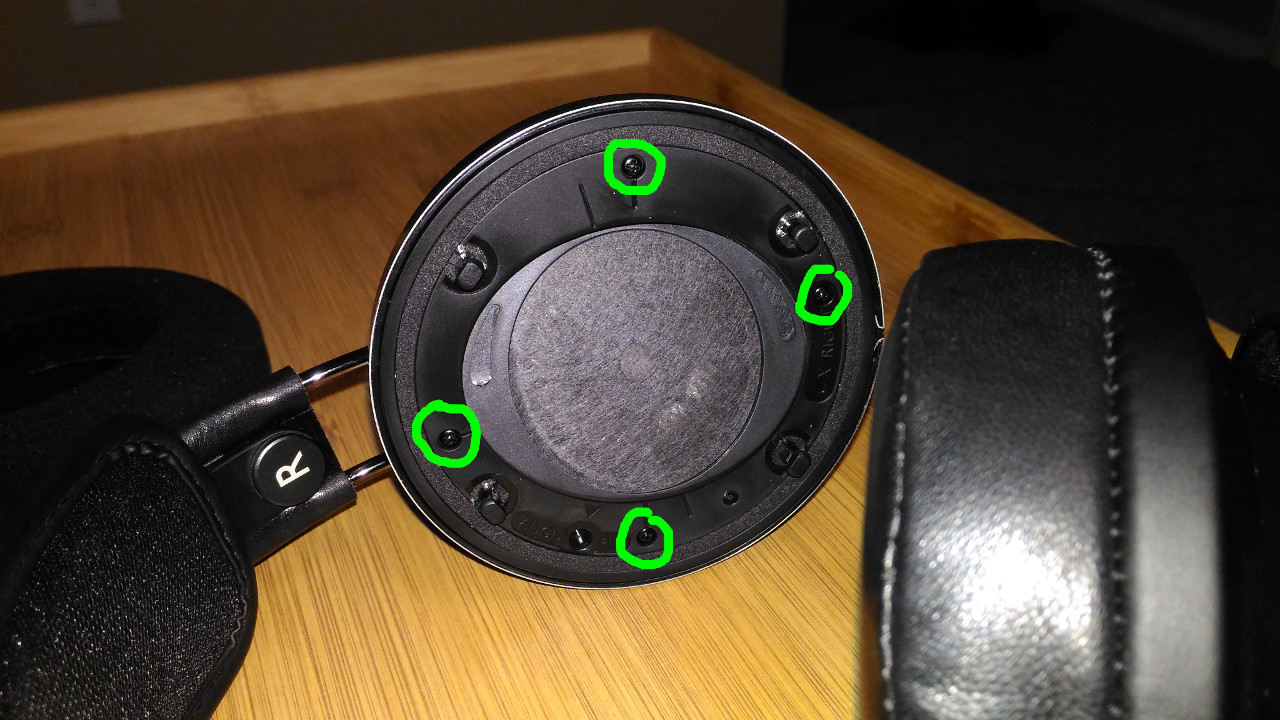
Four screws securing the driver housing
To disassemble the headphones to the point where you can tighten the screws, first you will need to remove the earpad. There are some X2 models manufactured by Gibson that had earpads which were glued down. I have never owned these, and can’t help with this. But for people who purchased X2s made by Woox, X2HRs, or X2s that were produced by Gibson after responding to complaints about the glue, all you have to do is grip the earpad evenly and firmly pull it straight out.
Now, you will see the driver in a housing that is secured with four screws. Remove these, and the housing should open up easily.
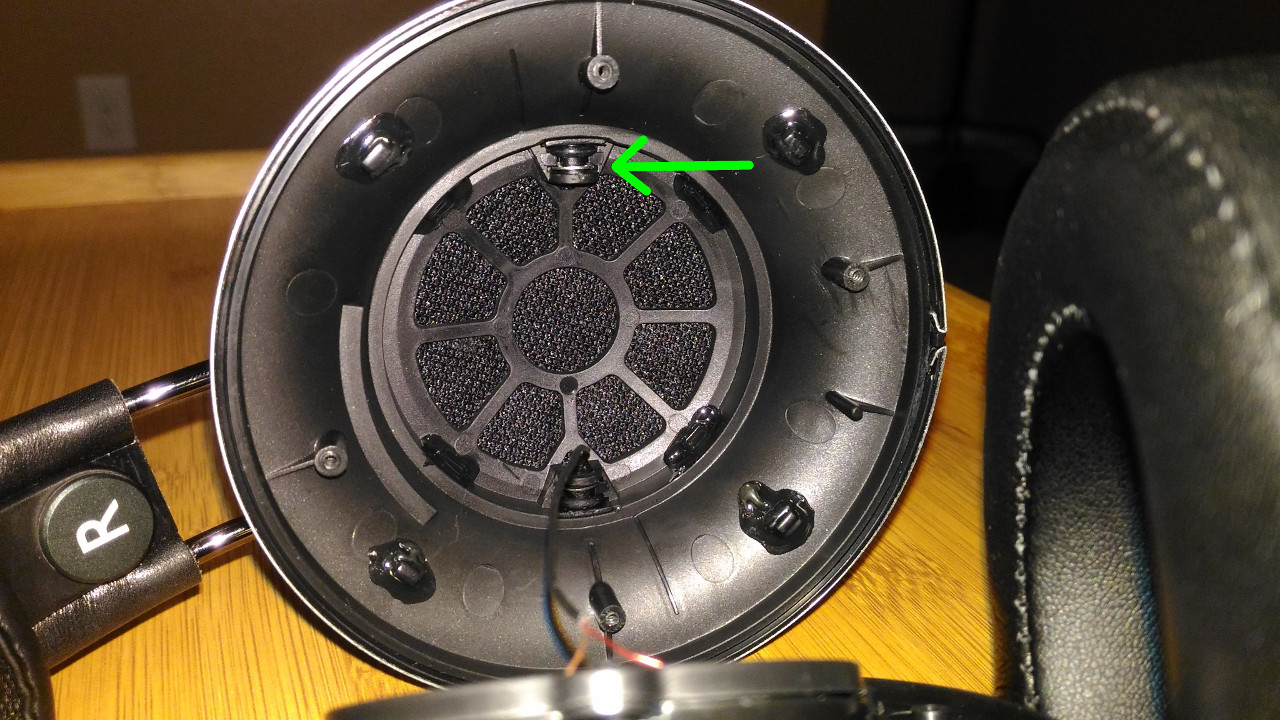
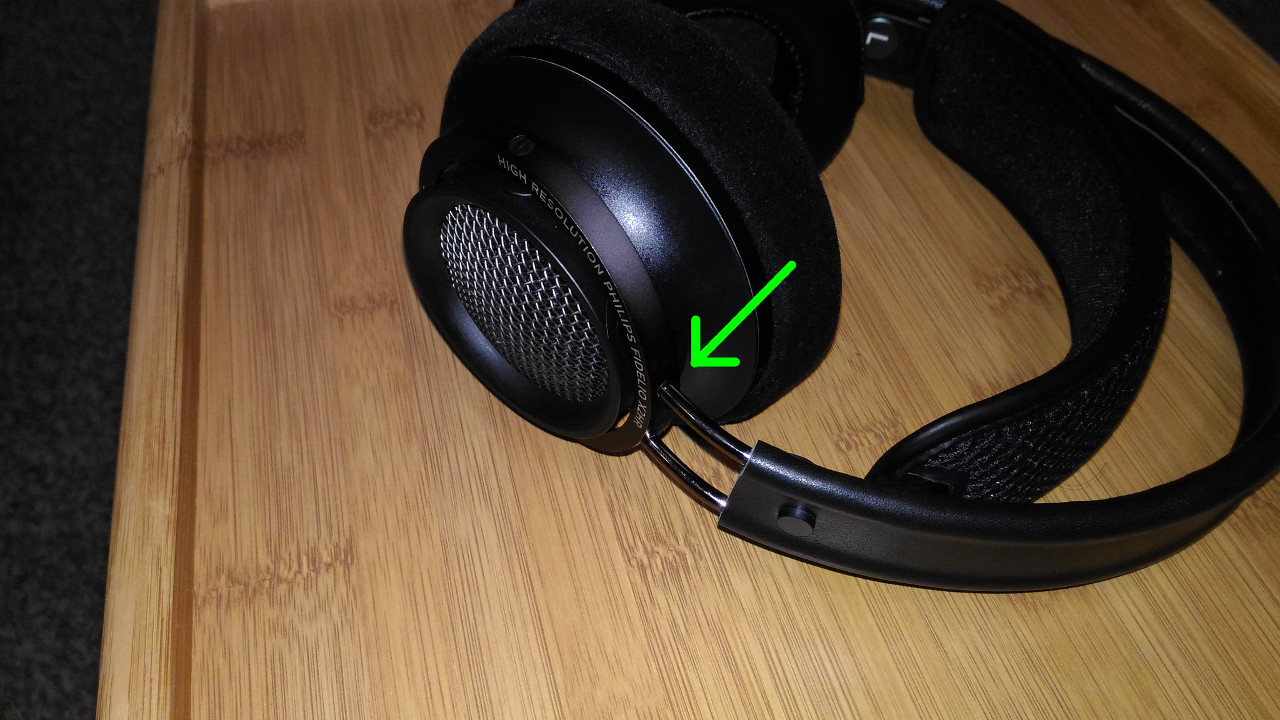
E-clip that secures a retaining/pivot pin
What we need to do next is remove two E-clips which secure the plastic pins that hold the earcup to the frame. However, the E-clips are glued in place with something that seems to me a bit like hot glue. This is where the tweezers come in. Pick out as much glue as you can. This is the most tedious part of the process. You will know you’ve gotten enough when you can rotate the E-clip so that the opening is away from you. At this point, use the needle nose pliers to firmly grip and remove the clip.
Retaining pin
Once the clips are removed, you can push the plastic retaining pins out from the inside. One of them can be completely removed. The other one houses the wire that connects to the driver, and this one will not be entirely removable. It will, however, come out enough that you can remove the earcup from the frame.
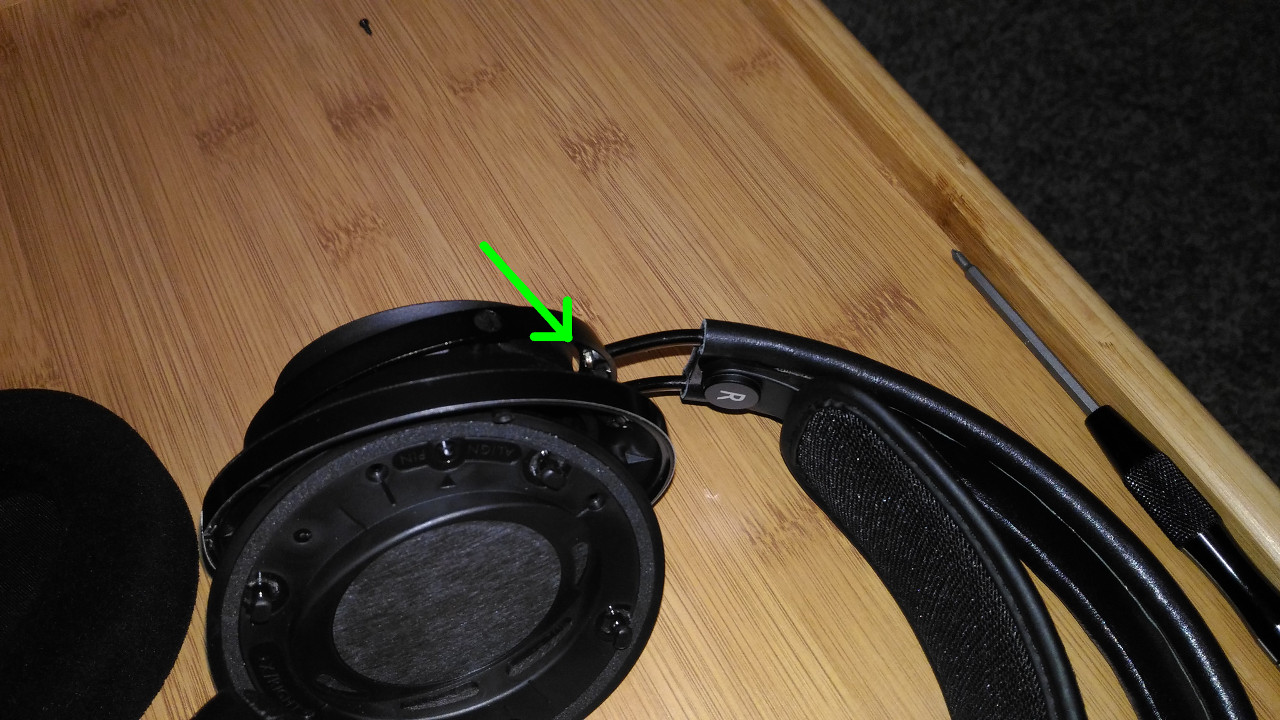
Finally, you are able to access the screws that attach the ring. They both have a slot for a slotted screwdriver, however one of them has the wire passing through the center, and you will want to use the wrench to avoid damaging it. The screw without the wire can be removed completely. The screw with the wire may not be entirely removable unless you wish to pick the glue which binds the wire to the inside of the aluminum ring. I opted not to do this, and simply loosened it a bit.
Apply the Locktite to both screws, then tighten them into place. Reverse the steps of this guide to reassemble. I did not re-glue the E-clips, and have yet to have any problems. Repeat if you need to fix the other side.
Congratulations! You now have rock-solid Fidelio X2s!
Bonus tip: I have noticed that Fidelio X2s are very sensitive to positioning for accurate left/right balance. I have found that rubber O rings for quieting mechanical keyboards make excellent spacers for minor adjustments, to be placed on the pegs that hold the earpads in place.